
A Master Technique for Savory or Sweet Filled Pastries
This is written as a technique recipe, so you can use it for pigeon, beef, chicken, pork, mushrooms, seafood, vegetables, fruit, or other fillings.
A traditional pithivier is associated with Pithiviers in France. Modern savory versions are often elaborate game pies containing layers of meat, mousse or forcemeat, foie gras, mushrooms, truffles, or vegetables.
Recipe Information
Servings: 4 to 6
Prep Time: 1 hour, plus chilling
Cook Time: 25 to 45 minutes, depending on filling
Total Time: About 3 hours
Difficulty: Level 4 Advanced
Cost: Level 3 Moderate to Level 5 Splurge, depending on filling
Region / Ethnic Origin: French
The Construction Principle
Think of the pithivier as having four structural layers:
- Interior filling
- Optional protective wrapper, such as spinach, cabbage, crêpe, prosciutto, or another thin barrier
- Bottom puff-pastry disc
- Larger upper puff-pastry sheet, which stretches over the dome and seals to the base
La Palombe uses baked spinach to line a mold, then layers chicken mousse, brined pigeon breast, duck liver, more mousse, another pigeon breast, and additional mousse. The spinach is folded over the filling, and the molded center is briefly frozen before being enclosed in pastry.
That basic architecture is what makes the technique so adaptable.
Ingredients
For the pastry shell
- 2 sheets all-butter puff pastry, about 1/8 inch thick
- 1 large egg
- 1 large egg yolk
- 1 tablespoon water
- Flour, for dusting
For the filling
Use approximately 1 1/2 to 2 pounds total prepared filling for one medium pithivier.
A successful filling usually contains:
- 8 to 12 ounces primary ingredient
- 8 to 12 ounces binding or surrounding mixture
- Optional central accent ingredient
- Salt and seasoning as appropriate
Examples include:
Meat
- Beef tenderloin with mushroom duxelles
- Chicken breast with chicken mousse
- Duck with mushroom forcemeat
- Pork tenderloin with sausage forcemeat
- Venison with mushroom mousse
Vegetarian
- Roasted mushrooms with mushroom duxelles
- Spinach, ricotta, and mushroom
- Roasted squash with caramelized onion
- Potato, leek, and Gruyère
Seafood
- Salmon with spinach mousse
- Scallops with shrimp mousse
- Lobster with leek fondue
Sweet
- Apple and almond cream
- Pear and frangipane
- Stone fruit and almond cream
Instructions
Prepare the filling
- Prepare every filling component completely before beginning the pastry assembly.
- Remove as much excess moisture as possible. This is one of the most important rules in successful pithivier construction. Wet fillings create steam and can make the bottom pastry soggy or burst the shell.
- Cool all cooked components completely before assembly. Never put a warm filling inside puff pastry.
- Season the filling slightly more assertively than you might when serving it alone because the pastry softens the overall seasoning.
Create a moisture barrier
- If the filling is particularly moist, line the mold with a protective layer.
La Palombe uses spinach that is first heated to remove excess moisture and then arranged inside the mold.
Other excellent barriers include:
- Blanched and dried spinach leaves
- Savoy cabbage
- Thin crêpes
- Prosciutto
- Very thin omelet
- Mushroom duxelles
- Thin slices of roasted vegetable
The barrier has two purposes: it helps contain the filling and prevents liquid from migrating directly into the puff pastry.
Mold the filling
- Line a round bowl, ramekin, hemispherical mold, or similar container with plastic wrap, leaving plenty hanging over the sides.
- Arrange the moisture barrier inside the mold, overlapping the pieces so there are no major gaps.
- Spread approximately one-third of the binding mixture into the bottom and sides of the mold.
For the La Palombe version, this is chicken mousse.
- Place the first substantial filling component in the center.
- Pack more mousse, duxelles, forcemeat, cheese mixture, or other binder around it. Eliminate air pockets.
- Add any central luxury or flavor component.
Examples:
- Foie gras
- Truffle
- Cheese
- Mushroom duxelles
- Caramelized onions
- Roasted garlic
- Herb butter
La Palombe places duck liver between its pigeon layers.
- Continue layering until the mold is completely filled.
- Smooth the final layer so the base of the molded filling will sit level.
- Fold the spinach, cabbage, crêpe, prosciutto, or other liner over the exposed filling.
- Fold over the plastic wrap and compress gently.
The goal is a dense, cohesive dome with no large air pockets.
Why the Dome Must Be Chilled
- Refrigerate for at least 1 hour, or place in the freezer for approximately 20 to 30 minutes.
La Palombe freezes its molded filling for about 20 minutes before wrapping it in pastry.
You do not necessarily want the center frozen solid.
What you want is:
- Firm enough to handle
- Cold enough not to soften the pastry
- Stable enough to retain its shape
- Dry enough on the surface for the pastry to adhere
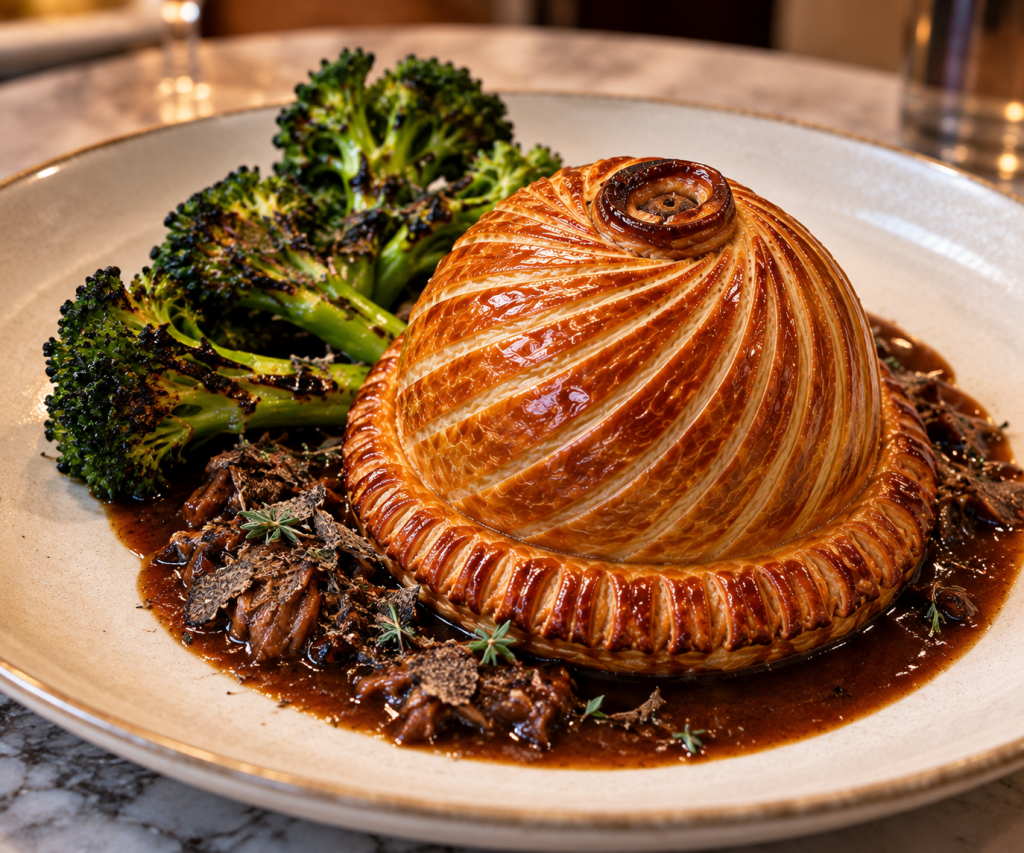
This step is one of the secrets to obtaining the very clean dome visible in your screenshot.
Building the Puff Pastry Shell
Prepare the base
- Roll the first sheet of puff pastry to approximately 1/8 inch thick.
Do not crush the pastry excessively. Puff pastry rises because hundreds of alternating layers of dough and butter expand during baking.
- Cut a circle approximately 1 1/2 to 2 inches wider than the base of the chilled filling.
For example, if the filling is 5 inches across, cut a bottom disc about 7 inches across.
- Place the disc on a parchment-lined sheet pan.
- Refrigerate while preparing the upper pastry.
Prepare the upper pastry
- Roll the second pastry sheet slightly larger than the first.
The upper piece requires considerably more pastry because it must travel up, over, and down the dome.
A good starting point is about 3 to 4 inches larger in diameter than the filling itself.
Do not cut the upper piece too closely. Excess pastry can be trimmed after assembly.
The Critical Wrapping Technique
- Remove the molded filling from its container.
- Remove the plastic wrap completely.
- Place the filling exactly in the center of the bottom pastry disc.
- Brush a narrow ring of egg wash around the filling, leaving approximately 1/2 inch at the outer edge relatively dry.
Do not flood the pastry with egg wash. Excess egg between laminated layers can glue them together and restrict the rise.
- Center the larger sheet of pastry over the dome.
- Allow it to settle naturally over the filling.
Do not aggressively stretch the pastry.
Instead, use both hands to gently guide it down the sides.
- Working around the circumference, smooth the pastry downward using the flats of your fingers.
The goal is to remove trapped air while maintaining an even thickness.
- Press the upper pastry against the lower pastry immediately around the base of the filling.
This establishes the first seal.
- Continue pressing outward toward the edge.
Do not press directly onto the filling so hard that you distort the dome.
Preventing Air Pockets
One of the biggest problems with this style of pastry is trapped air between the filling and the pastry.
That air expands dramatically during baking and can produce:
- Hollow pockets
- Cracked pastry
- Misshapen domes
- Filling leakage
As you lower the pastry over the dome, work gradually from the top downward, pushing air toward the open bottom edge.
Do not seal the outer edge until the pastry is sitting tightly against the filling.
Creating the Decorative Base
- Trim both pastry layers together into a clean circle.
Leave approximately 1 to 1 1/2 inches of pastry extending beyond the filling.
- Seal the edge firmly with your fingertips.
- Crimp the outer edge using the back of a knife or your fingers.
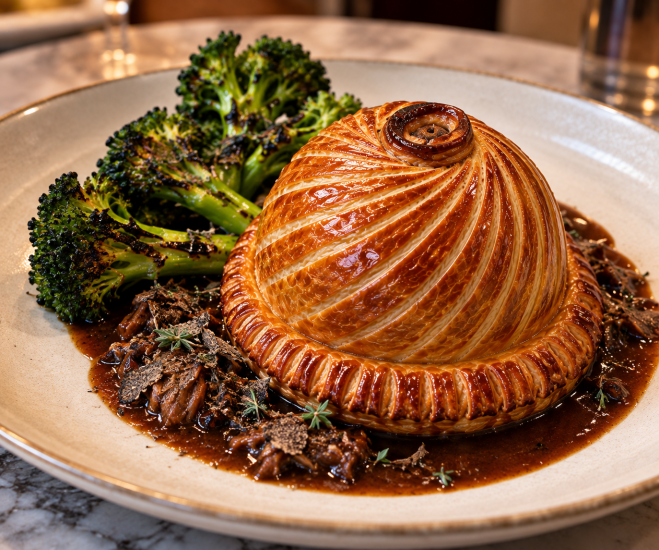
The striking pleated border in the photograph comes from repeatedly pushing the pastry inward around the circumference.
A traditional technique is to hold a small knife almost vertically and gently push the pastry inward every 1/4 to 3/8 inch.
The result resembles a flower or scalloped sunburst.
Do not cut completely through the pastry.
First Egg Wash
- Beat together:
- 1 large egg
- 1 large egg yolk
- 1 tablespoon water
- Brush an extremely thin layer over the entire exposed pastry.
Avoid allowing egg wash to run down into the cut pastry edges because it can prevent them from separating and rising.
- Refrigerate for 20 to 30 minutes.
La Palombe similarly applies egg wash, chills the pastry, and then applies another coating.
Second Egg Wash
- Apply another very thin coat of egg wash.
This double coating is one reason restaurant pithiviers develop that extraordinary deep mahogany gloss rather than simply looking pale golden.
- Refrigerate again for approximately 15 minutes.
The surface should become slightly tacky rather than wet.
Creating the Spiral Pattern
The pattern on your photograph is a classic decorative pithivier treatment.
- Find the exact center of the dome.
- Using the tip of a very sharp paring knife, make a tiny vent.
- Starting near that center point, score a curved line down toward the base.
- Rotate the pastry slightly and create another curved line.
- Continue around the dome.
Each line should sweep in the same direction.
The finished pattern resembles a turbine, pinwheel, or spiral.
Important: score only through the outer surface of the pastry.
You are cutting perhaps 1/32 to 1/16 inch deep.
Do not cut completely through the pastry except at the steam vent.
La Palombe specifically chills the egg-washed pastry before cutting its decorative pattern.
Optional Decorative Ring
The lower portion of the pastry shown in your photograph appears to have a strongly defined pleated or fluted perimeter.
To duplicate that appearance:
- Hold the dull side of a paring knife against the outer rim.
- Push inward approximately 1/4 inch.
- Move about 1/4 inch around the circumference and repeat.
- Continue until the entire edge is pleated.
This creates the dramatic flower-like border visible around the finished pithivier.
Final Chill
- Refrigerate the completely assembled pastry for 30 to 45 minutes.
This step is worth the time.
Cold butter produces stronger puff pastry expansion.
A warm pastry tends to:
- Spread
- Leak butter
- Lose decorative scoring
- Distort around the filling
Baking
Because fillings vary enormously, use internal temperature—not simply time—to determine doneness.
- Preheat the oven to 425°F.
- Place the pastry on the center rack.
- Bake for approximately 10 to 15 minutes, until the pastry begins expanding vigorously.
- Reduce the oven temperature to 375°F.
- Continue baking until deeply browned and the filling has reached the appropriate internal temperature.
La Palombe reports baking its particular pigeon version for about 18 minutes, but that timing is specific to its filling, portion size, and professional oven and should not be considered universal.
For a larger home version, expect roughly 25 to 45 minutes total.
Internal Temperature Guide
For fillings containing raw proteins, check through the center vent with a thin instant-read thermometer.
Use the appropriate safe temperature for the specific protein you have chosen.
For example, poultry-based mousses and forcemeats generally require a higher finished temperature than an intact beef tenderloin intended to remain rosy.
That means the filling should be designed so that its different components reach desirable doneness at approximately the same time.
This is particularly important when adapting the method.
Resting
- Remove the pastry from the oven.
- Allow it to rest 10 to 15 minutes before cutting.
The rest accomplishes three things:
- Steam pressure falls.
- Interior juices redistribute.
- The filling becomes easier to slice cleanly.
A properly built pithivier should retain distinct layers when sliced.
The Formula for Inventing Your Own Pithivier
The easiest way to design one is:
Protective layer + binder + centerpiece + binder + optional accent + binder + protective layer
For example:
Beef Wellington Pithivier
Crêpe
→ Mushroom duxelles
→ Beef tenderloin
→ Duxelles
→ Foie gras
→ Duxelles
→ Crêpe
→ Puff pastry
Chicken and Mushroom
Spinach
→ Chicken mousse
→ Roasted chicken breast
→ Mushroom duxelles
→ Chicken mousse
→ Spinach
→ Puff pastry
Pork and Apple
Cabbage
→ Pork forcemeat
→ Pork tenderloin
→ Caramelized apple
→ Pork forcemeat
→ Cabbage
→ Puff pastry
Mushroom Pithivier
Spinach
→ Mushroom duxelles
→ Roasted king oyster mushrooms
→ Gruyère
→ Mushroom duxelles
→ Spinach
→ Puff pastry
Salmon Pithivier
Spinach
→ Salmon mousse
→ Salmon fillet
→ Wilted leeks
→ Salmon mousse
→ Spinach
→ Puff pastry
The Most Important Design Rule
The center filling should be considerably drier than you think.
The pastry itself traps steam.
If the filling contains excessive:
- Stock
- Cream
- Vegetable water
- Mushroom liquid
- Meat juices
that moisture has nowhere to escape quickly.
The result can be a soggy layer immediately beneath the filling even while the exterior looks beautifully browned.
For mushroom fillings, for example, cook the duxelles until it almost resembles a paste.
For spinach, cook it and then squeeze it very dry.
For roasted meat, cool it before wrapping.
For braised meat, reduce the braising liquid separately rather than putting a wet stew inside the pastry.
Why La Palombe’s Version Works So Well
There are several particularly smart elements worth borrowing from their method.
The spinach liner creates a clean barrier between mousse and pastry. The chicken mousse acts as both a filling and an adhesive structure around the pigeon. The brief freezing step produces a very firm geometry for pastry wrapping. The two-stage egg wash and chilling creates an extraordinarily polished surface. Finally, scoring after chilling gives the restaurant the extremely precise spiral pattern visible in your screenshot.
That combination is more useful than simply copying their pigeon filling—it is essentially a construction system for almost any elaborate dome-shaped puff-pastry entrée.
One additional improvement I would make for a home-kitchen version is to build the filling the day before, refrigerate it overnight in its mold, then give it only a short freezer chill before wrapping. That dramatically reduces the stress of trying to prepare the interior and laminate the pastry during the same session.


Leave a Reply